Showing posts with label Vegetable Dish Recipes. Show all posts

Wednesday, January 5, 2011

New Year, New Possibilties

Well, I'm a bit late on the Happy New Year Ra Ra! and the resolution this and holiday that train, but I hoped if I got it in before the week was over it might still be considered timely. I realize that by now everyone is well and truly tired of the holiday season and wants to move on to Mardi Gras and spring and new things. I do too, but I've got these cabbage and blackeyed pea photos on my phone and they are really nice things to eat at any time of year so I'm going to share.

On New Year's Day, I always try to do the traditional good luck thing but this year I was bored of Hoppin' John and braised cabbage, so I went a different route. Inspired by the cold bean side salad (usually served alongside pork rillette and various other dishes) at Tartine, I ad libbed a little black eyed pea salad with a red wine vinegar dressing. For the cabbage, I went with a chilled salad as well, using a NY Times recipe from a few years back for savoy cabbage slaw with applesauce vinaigrette and mustard seeds. They were both wonderful.  The bean salad is simple and delicious.  The slaw is so much better than you might think (and also makes surprisingly good leftovers).  I served them both with seared pork chops and it was a lovely meal.  Recipes, below.


I have to stop using my iPhone to take food photos. The white balance is terrible and my kitchen is nothing but yellow light at night. Sorry 'bout that, folks.

As for new year's resolutions, I'm going to keep it simple this year and rather than try to reform my hopeless ways, I am resolving to expand myself and do some things I've never done before, but think that by now I really should have. In some cases, it's unforgivable that I haven't yet. In 2011, I plan to:

Eat:

1. a muffaletta at Central Grocery - I've had them at lots of places in NOLA but never there, and really, what kind of muffaletta lover do I think I am if I haven't, right?.
2. turtle soup at Commander's Palace - When given the choice, I always go for new generation restaurants over the old traditionals, so I have a huge gap in my NOLA restaurant experiences. This seems to be a glaring one.
3. boiled crawfish at Hawk's in Rayne, La - Happily, my brother in law lives very close to it and we have plans for this spring.

Cook/Make:

1. Butter - I (oh so briefly) met Chef Daniel Patterson of Coi Restaurant in San Francisco several years ago (and had the pleasure of dining at Coi, which if you ever have the opportunity to do, DO!) and later watched him make butter in this fun video. Epiphany! Homemade butter! I've wanted to do it ever since, at least once, and now that I've gotten a stand mixer for Christmas, I intend to. Just look at it! All yellow and beautiful. Imagine lacing it with fleur de sel and spreading it on fresh bread with radishes. mmmm.... I'm not sure the reality can live up to my bucolic fantasy but we shall see.

2. Marshmallows - Another project that required a stand mixer to do, and one that I think I only need to try once or twice to appease the desire. The sticky clean up factor will probably prevent too many repeats, but I do want to sink my teeth into very fresh marshmallow. 2011!

3. Madeleines - Got the pan. Gonna make the treats. More than once. Need to put the pan to use and not let it collect dust in the back of the cupboard.

Do:

1. Learn to shuck oysters - This requires an leap of faith on my part. I am trusting that this year, my rheumatoid arthritis will be treated into remission and I will have the ability to bend and twist and bear weight with my right wrist again. Once I can, I plan to celebrate by learning to shuck and then eating a minimum of a dozen oysters on the half shell with champagne. It just seems right.

2. Plant some container herbs and tomatoes - This one borders on the "yeah right" type of resolution, since I say I'll do this every year and don't, but I might as well try again this year. Perhaps you can help me stick to it by reminding me when the time comes that I need to get those plants going.

3. Visit some of the River Road plantations - I never have. Might as well learn a bit more about the history of Southern Louisiana. I've always perceived the plantations as too tainted by the horror of slavery to make it enjoyable for me to visit for pleasure, but maybe by shutting the entire idea out, I am allowing myself to be ignorant. Maybe I could learn a thing or two. And eat a thing or two along the way.

That's that.

The recipes:

Black Eyed Pea Salad

1 lb frozen black eyed peas (precooked), thawed
1 red bell pepper, diced
1 small red onion, diced
2 TB fresh flat leaf parsley, chopped (optional)
drizzled olive oil, to taste
red wine vinegar, to taste
salt and black pepper to taste

Mix gently and serve cold or room temperature.  That's it.  It's delightful.

Serves 6


Savoy Cabbage Slaw with Applesauce Vinaigrette & Mustard Seeds
Adapted from Jeremy Fox, Ubuntu, Napa, California


FOR THE VINAIGRETTE:

1 teaspoon Dijon mustard
1/2 teaspoon salt
2 tablespoons apple cider vinegar
1 tablespoon applesauce
1/3 cup olive oil

FOR THE SALAD:

4 cups savoy cabbage, sliced as thinly as possible (store was out of Savoy by the time I got there, so I used half green and half Napa)
1 large bunch red radishes
3 or 4 Granny Smith apples
1 lemon, juiced
1 teaspoon mustard seeds
1/2 cup walnuts, toasted and chopped
Salt and black pepper to taste.

1. Make vinaigrette: In a bowl, mix together mustard, salt, vinegar and applesauce. Slowly whisk in olive oil a little at a time until dressing emulsifies. Set aside.

2. Make salad: Put cabbage in a large bowl. Using the shredding blade of a food processor or a box grater, shred radishes until you have 1 cup. Add to bowl.

3. Core apples and shred in food processor or with box grater until you have 2 cups. Put shredded apple into a bowl filled with lemon juice and 2 cups water, to prevent apple from browning.

4. When ready to serve, gently squeeze water from apple, add to cabbage and toss slaw with vinaigrette. Add mustard seeds and toss again. Sprinkle walnuts on top of slaw. Season with salt and pepper.

Serves 6

Read more...

Tuesday, November 16, 2010

Swiss Chard and Tomatoes over Soft Polenta


I've been on a really big polenta kick ever since returning from Venice.  I can't get enough of it.  I've gone so far as to contemplate buying relatively expensive, very high maintenance freshly stone ground polenta from the internets.  I still might.  In the meantime, here is a little recipe that I made using Bob's Red Mill Polenta Corn Grits, available at your friendly neighborhood Whole Foods, and probably lots of other groceries as well.  Bob's are par-boiled, so the cook time is really short compared with true, long cooking polenta that takes an hour or more.  Start cooking your chard and tomatoes about 10-15 minutes into the polenta cooking process.


Polenta


3 c water
1 c polenta
1 t salt
2 TB butter or olive oil
1/2 c grated Parmesan cheese


In a heavy bottomed pot, boil 3 cups of water.  Whisk in the polenta and salt.  Turn down the heat and stir constantly until the polenta is suspended in the water and no longer settles to the bottom of the pot.  Cook for 30 minutes at a bare simmer.  Stir frequently, being careful not to burn yourself if the polenta bubbles pop and splatter.  Add water if the polenta gets too thick.  You want the it to stay soft.


Stir in butter and Parmesan.  Taste and add more salt if needed. 

For the Chard and Tomatoes:

1-2 bunches swiss chard (1 bunch if you are cooking for two, 2 if you are serving 4)
1 TB extra virgin olive oil
1/4 ts crumbled red chili pepper flakes
2 large garlic cloves, sliced finely or minced
a handful of grape tomatoes, sliced lengthwise

Prepare chard by washing,  rinsing and drying thoroughly.  I dry mine after it's cut (in a salad spinner) but it can also be dried with towels while still in whole leaf form.   Pull or cut the leaves from the center rib.  Chop the ribs into slices and cut the leaves into ribbons, approximately 1 inch wide.

When your polenta is about half way through the cooking process, start cooking the chard.  In a heavy pan, heat the olive oil until it shimmers over medium heat.  Add garlic and saute until it just begins to be fragrant, about 30 seconds to a minute.  Add the chili pepper and quickly stir.  Add chard ribs and saute gently until they begin to soften, about 2-3 minutes.  Add chard leaves and salt.  Cook, stirring occasionally, until the chard leaves begin to wilt and become tender.  Add a tablespoon of water if the pan begins to dry out at any point.  Add tomatoes and saute gently until they are warmed through but not breaking down.  Taste for seasoning and salt if desired.  If you have a good finishing salt like Fleur de Sel de Guérande, this is really nice place to use it.

Serve immediately by placing a large spoonful of soft polenta into a bowl and using the spoon to create a dip in the center.  Top with sauted chard and tomatoes.

Read more...

Thursday, November 11, 2010

Orecchiette with Broccoli, Tomatoes and Pine Nuts


This is an easy and lovely dish using one of my favorite pastas, the tiny orecchiette.  Shaped like (and named after) a "small ear", its delicately curved, disc-like shape is perfect for capturing tiny bits of deliciousness in every bite... hence the broccoli.  Cutting the broccoli florets into very small pieces ensures that they will nestle into the hollows in the pasta, along with the pine nuts and grape tomato halves, to delicious effect.


1/2 lb (8 oz) orecchiette pasta
boiling water
2 TB extra virgin olive oil
1/2 lb (a medium sized) broccoli crown
2 garlic cloves, minced
1/2 ts crumbled red chili pepper flakes
a large handful of grape tomatoes, halved lengthwise
2 TB pine nuts
freshly shredded Parmesan to top
salt to taste

Here is how I time things so that they all finish simultaneously.


Start your pasta boiling water and when it is getting close to boiling (but not really there yet), begin to chop your garlic and broccoli.  Cut the broccoli a bit obsessively (and wastefully, to be honest).  You want only the florets, chopped to their smallest parts, discarding the stems and stalk.  Mince your garlic.

Add pasta to the boiling, salted water.  Cook for the amount of time dictated by the package (usually about 11 minutes).

Heat olive oil on medium high heat in a large skillet until it shimmers. Add garlic and red pepper flakes to the pan.  Cook for about 30 seconds and then add the broccoli.  Lightly salt.  Saute, stirring occasionally, for 5-6 minutes.  Let it rest at times, so that you get a bit of caramelization on the broccoli.

Meanwhile, in a small skillet, lightly toast your pine nuts over medium low heat.  Toss them frequently, since they burn easily.  As soon as you see them begin to get a golden hue (after about 2 minutes or less), add them to the broccoli.

When broccoli is wilting and beginning to get a glossy, garlicky coating and the pasta only has a minute or two left on it, add the halved tomatoes to the broccoli skillet.  These should only cook for about 2 minutes, long enough to warm through but not really break down.  You want them to retain their shape.

Drain pasta and add to the broccoli pan.  Mix well.  Salt to taste.  Serve immediately, topped with shaved Parmesan.

Serves 2 with seconds or 4 with salad and bread.

* adapted from a recipe in the Italian Easy: Recipes from the London River Cafe Cookbook to have no pancetta but a ton of flavor anyway.

Read more...

Monday, August 23, 2010

Vegetarian Pigs in a Blanket (Cabbage Rolls)

I am intensely fortunate.  While I am still struggling with wrist and hand pain from my new Rheumatoid Arthritis diagnosis (about which I am still totally and completely all "WTF?!"), I have dear friends who will stand in the blog breach for me.  Today begins a series of guest posts from friends of mine, mostly located in places far from New Orleans, who love food and are generously willing to bare their kitchens, recipes and restaurants to our wondering eyes.  This post is from the lovely Melinda, who lives in the beautifully fair city of Seattle.  Please make her feel welcome, folks!  *warm round of applause*


Hi! I'm Melinda, and I'm excited to be guest-blogging here at NOJuju. At first I was hesitant to write for this blog - after all, I don't live in New Orleans, and I know next to nothing about the food culture there, other than the fact that everything I have ever eaten there was extremely delicious and made from crawfish. I live in Seattle, where it's easier to get good Eritrean food than anything that hails from Louisiana (which is a whole 'nother blog post), and where we can't even grow okra or peppers because it doesn't get hot enough. I live right in the city with my husband, who enjoys cooking as much as I do.

And after an introduction like that, I have to tell you that this post of mine isn't even about food specific to Seattle. It's about cabbage rolls. Except that I don't even call them cabbage rolls - everyone in my family has always called them 'pigs in a blanket', much to the confusion of almost everyone else I talk to here, who think of pigs in a blanket as being hot dogs stuffed inside croissants. If you're wondering why that is, Wikipedia has the answer, as usual: it turns out that "In regions heavily influenced by Slovak immigrants, such as northern Pennsylvania, the term usually refers instead to stuffed cabbage rolls, such as the Polish or Ukrainian Gołąbki." Seeing as how I'm originally from Michigan, which is full of people of Eastern European descent, there's no surprise there. In Michigan, people get excited about pastries that nobody has heard of outside of Poland and the Upper Midwest.

A few months ago, I went to visit my grandma, and she made pigs in a blanket for everyone who descended upon her house that day. When I stopped eating pork about ten years ago, I figured I'd be giving up pigs in a blanket along with my bacon, but grandma made some extra ones with a meat substitute too, and they were darned good. They inspired me to start making plans for the enormous cabbage that has been growing in my garden since last September.

Pigs in a blanket aren't normally the nicest thing in the middle of August - they involve the crockpot being on all day, and that's much nicer when it's cold out. Ordinarily, I'd want them in January, but the cabbage's day of reckoning has finally arrived, and drastic measures are needed to use it all. I could only fit about half of it in the crockpot today; luckily, my husband promises that he has plans for the other half. I, for one, am half-hoping that he doesn't, because I'd love to try my hand at making kimchi or sauerkraut.

I ended up leaving these in the pot for around 7 hours, and they were tender and delicious. I attribute some of the niceness of this recipe to the homegrown cabbage, but I'm excited about how well my first attempt at pigs in a blanket turned out! I could definitely see them becoming a winter staple. I'd like to experiment with stuffing them with mushrooms instead of sausage; lots of nice mushrooms grow in the Pacific Northwest, and there is a wonderful variety of them available here during the fall and winter.

This recipe is vegetarian. To make it with meat, omit the olive oil (it's there to give the fake meat enough fat), and use ground pork or pork sausage. You can also use rice instead of bulgur, if you're so inclined. Some people parboil the cabbage leaves first in order to make them easier to manipulate, but I didn't.

1 package of vegetarian sausage
¼ cup olive oil
2 cups of bulgur wheat
1 onion
3 green peppers
1 box strained tomatoes
salt, pepper and herbs to taste (I used oregano, since the sausage already had some sage in it)
1 ordinary sized head of cabbage

Dice the onion and green peppers, and put them in a big bowl, along with the olive oil, bulgur wheat, and sausage. Smash this all up with your hands like you're making meatloaf. Roll it up in cabbage leaves and place them in the crockpot. Mix the strained tomatoes (or tomato juice, or tomato paste with water, or ketchup, if you're really in a bind) with salt, pepper and herbs. Dump over the top of the cabbage leaves. Turn the crockpot on and wait.

Enjoy!


(Shown with a side salad that my husband made)

Read more...

Tuesday, July 13, 2010

CSA Vegetable Sauté

I try to make a habit of visiting the Hollygrove Market and Farm on Tuesday afternoons.  They are kind enough to be there at non-crack of dawn hours (noon-6pm!) which makes it much, much easier for me.  I'm not the kind of girl who likes to sacrifice her morning sleeping time, no matter how beautiful the produce at the Farmer's Market.

Last week, I got the Box instead of just shopping the Lagniappe table the way I usually do.  It was filled with things I knew exactly what I wanted to do with and influenced my week's menu nicely.  Among other things, I was able to cook:

  • Fresh Blackeyed Peas with Cornbread and a sliced tomato and cucumber salad
  • Rigatoni with Eggplant Puree
  • Penne with Baked Tomato Sauce (will post the recipe for this soon.  it's wonderful)
  • Pork chops with Vegetable Sauté (the addition of a little bit of cornmeal makes this even better than a regular veg sauté, since it introduces some crispiness and texture to the dish)

For the Vegetable Sauté:

3 TB olive oil
3-4 new red potatoes, cut into small enough pieces that they can cook quickly (about 12 pieces per potato)
6 large okra pods, cut into half inch slices
1/2 cup cornmeal
salt, pepper and cayenne pepper to taste
1 yellow squash, cut into half moons
1 small zucchini, cut into half moons
1 small red bell pepper, halved, cleaned and sliced
1 clove garlic, minced

Heat olive oil in heavy bottomed skillet over medium high heat.  Mix cornmeal and a bit of salt, pepper and cayenne pepper to taste in a mixing bowl.  Toss cut potatoes in the cornmeal mixture to coat and then shake off excess.  Add to skillet and fry gently, turning after 2 minutes (or when golden on bottom side).  Continue to fry gently, without stirring too much, until potatoes begin to soften on the inside but have crisp exterior.
  
Meanwhile, toss okra in remaining cornmeal mixture and shake off excess.  Add to skillet when potatoes are beginning to soften through.  Sauté until okra is also golden, about 2 minutes.

Add squash, zucchini and red bell pepper.  Sauté until vegetables are beginning to caramelize but still firm/crisp, about 4-5 minutes.  Add minced garlic and sauté one more minute.  Salt and pepper to taste.  Serve immediately.

Makes 4 side portions.

Read more...

Tuesday, July 6, 2010

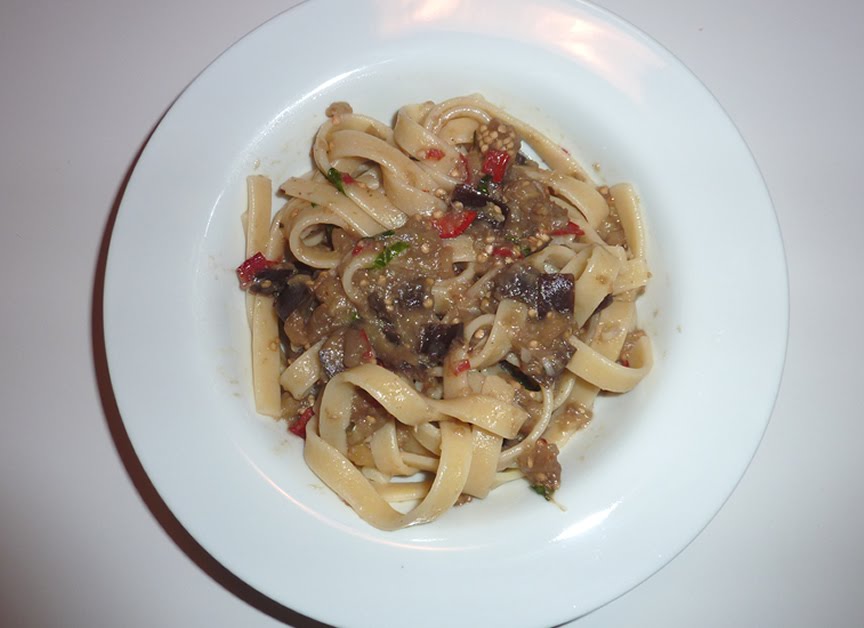
Pasta With Eggplant Puree


Contrary to the photographic evidence, this is a VERY sexy sauce.

I won't try to compete with the beautiful way in which Francis Lam or The Wednesday Chef have written this dish up.  If you don't already read their food blogs, begin immediately.  You can get both the recipe, lovely instructions, far better photos than mine, and the benefit of proper writing technique.

What I will tell you is that this is my new favorite thing.  I put mine over the best pasta I could get my hands on (splurged on the glorious $6/lb Rustichella d'Abruzzo) and thought I had found a portal into heaven.

Read more...

Wednesday, May 26, 2010

Balsamic Succotash and Vom Fass, New Orleans


Ever pull a hail Mary, 5 minutes before you need to start cooking, and just punch a couple of random ingredients into Google, hoping someone, somewhere has learned how to make them into a tasty dish?  I do... probably more often than I should admit.

Last night, it was because I had pork chops and a bag of frozen lima beans and it just didn't feel interesting enough so I tried to think of what I had on hand to spice that up.  The only thing that came to mind was the new bottle of beautiful balsamic vineger I bought at Vom Fass over the weekend.  Balsamico and lima beans didn't sound like a likely match to me but just in case, I googled them together and what I found was a recipe for Balsamic Succotash that I had all the ingredients for and just enough suspension of skepticism to try.  Good thing, because it was really nice!

Here's how I made mine:

Balsamic Succotash

2  tablespoons  butter
1  cup  chopped yellow onion
2  garlic cloves, minced
1/2  cup  chopped red bell pepper
1 small fresh zucchini, diced
2  cups  frozen corn kernels(thawed by running under cold water)
2 cups frozen baby lima beans (also thawed)
1/2  cup  chicken broth
1/2  teaspoon  sugar
1/2  teaspoon  salt
1/8  teaspoon  freshly ground black pepper
2 TB chopped fresh basil
1  tablespoon  balsamic vinegar

Melt butter in a large nonstick skillet over medium heat. Add onion and garlic and cook 3 minutes or until onion softens, stirring occasionally. Add zucchini and sauté for one minute.  Add corn, bell pepper and beans; cook 4 minutes, stirring occasionally. Add fresh basil, broth, sugar, salt, and black pepper; cook 7 minutes or until liquid almost evaporates. Remove from heat and top with balsamic vinegar, stirring gently.

.....

Speaking of balsamic vinegar, last week was my first time finally getting to Vom Fass, the shop at Magazine and Nashville that specializes in a wide selection of oils, vinegars, wines and spirits.  They have whole walls of casks dedicated to each and you can taste anything you like.  Kid Cayenne and I tasted at least 3 or 4 Aceto Balsamico di Modenas before deciding on a small bottle of thick, delicious "Maletti".  What's wonderful about this is that you can get whatever amount you like, from 40ml to several hundred, allowing you to try special things without wrecking your grocery budget on a large bottle.  Perfect for us.   We also tasted and purchased some lovely olive oil.  Nick, the General Manager, was infinitely patient and informative as I searched for an olive oil that had just the right balance of flavor for my taste.  Vom Fass has a modest selection of wines and a much wider selection of spirits and liqueurs.  I noticed grappas, absinthe, brandies and whiskeys (a few of which we also tasted).

On a shady corner with not much signage, Vom Fass might be going un-noticed by many.  It's worth a visit (or several) and could certainly use the word of mouth.  Go!

Read more...

Tuesday, April 13, 2010

Polenta Torta with Wilted Chard


From the Alice Waters cookbook, The Art of Simple Food, I made the Polenta Torta recipe, adding the Wilted Chard variation.  It is wonderful.  Possibly not terribly photogenic (or maybe that's just me and my terrible plating and photography skills), but otherwise, truly wonderful and simple and good.

First, make the polenta.

Polenta

4 c water
1 c polenta
1 t salt
3 TB butter or olive oil
1/2 c grated Parmesan cheese

In a heavy bottomed pot, boil 4 cups of water.  Whisk in the polenta and salt.  Turn down the heat and stir constantly until the polenta is suspended in the water and no longer settles to the bottom of the pot.  Cook for 45 minutes to an hour at a bare simmer.  Stir occasionally.  Add water if the polenta gets too thick.

Stir in butter and parmesan.  Taste and add more salt if needed.  Keep warm until ready to prepare the torta.

In the last 20 minutes or so of the polenta cooking, begin the chard.  I used rainbow chard because I can never resist the beautiful colors.

Wilted Chard and Onion

1 bunch of chard
2 TB olive oil
1 onion, diced
salt

Wash and drain the chard.  Pull the leaves from the ribs.  Trim the ends of the ribs and cut them into thin slices.  Cut the leaves into wide ribbons.


In a heavy pan, heat the oil until shimmering and add the onion.  Cook over medium heat, stirring occasionally,  until soft, about 5 minutes.  Add the chard ribs and continue cooking for three minutes.  Add the chard leaves and salt.  Cook, stirring occasionally, until the leaves are tender.  Add a bit of water if the pan gets dry or the onions begin to stick or brown.


When both the chard and polenta are ready, you will begin to prepare the torta.  It is important to prepare the torta as soon as the polenta is ready, otherwise it will begin to set.  You need the polenta to be soft and spreadable.

Polenta Torta

2 c soft polenta
2 c tomato sauce
1 c Parmesan cheese, grated
1/2 lb fresh mozzarella (about 2 medium balls)

Oil an earthenware or other low-sided baking dish.  I used a 9x13 and questioned afterwards, whether it was too large.  A slightly smaller one might have been more appropriate.  Alice Waters does not specify.


Ladle in 1 1/3 cups of soft polenta and spread it over the bottom of the dish.  Spread 1 cup of tomato sauce over the polenta.  On top of the tomato sauce, arrange half of the mozzarella slices.  Sprinkle with half the grated.  Parmesan cheese.  Layer half the chard.  Over the chard, ladle another 1 1/3 cups of soft polenta, spread on the rest of the tomato sauce, then the mozzarella and Parmesan and the remaining chard.  Ladle the remaining polenta over the top.  Allow the torta to sit for 30 minutes before baking to allow the polenta to set.  Preheat the oven to 350°F.  Bake the torta until hot and bubbling, approximately 30 minutes.

Read more...

Friday, April 9, 2010

Sauteed Cauliflower with Garlic


I have an excellent reason for never having picked up an Alice Waters cookbook before.  I once saw an episode of Sundance's Iconoclast with Alice Waters and Mikhail Baryshnikov.  Alice Waters annoyed me. A lot.  There you have it. 

Of course, I sometimes come across recipes credited to her that seem right, right up my alley.  After having that happen enough times, I figured I might be missing something.  I found a copy of  The Art of Simple Food at the library last week and have been engrossed in it ever since.

The first recipe I tried was for Sauteed Cauliflower.  The only ways I've cooked cauliflower in the past was as a simple puree or mash.  I've considered roasting it (my favorite way to cook any vegetable) but hadn't gotten around to it.  A saute sounded very simple and potentially very good.  And it is.

1 head of cauliflower
salt
olive oil
minced garlic

Remove the leaves from the cauliflower.  Remove the base of the stem with a sharp knife.  From the top down, cut the cauliflower into 1/4 inch slices.

Heat olive oil in a heavy bottomed pan over medium-high heat.  When the oil is shimmering but not smoking, add the cauliflower and salt.  Let the cauliflower sit until it begins to brown.  Turn or toss, cooking until the cauliflower is tender, about 7 minutes total.  In the last minute or two of cooking, add minced garlic and toss.  When finished, season with additional salt if needed and a drizzle of extra-virgin olive oil.

That's it.  It's lovely.  She offers a number of variations as well including adding parsley, chopped salt cured anchovies and capers, hot chili flakes and coarsely chopped olives and using it to dress pasta.  I put it alongside seared pork chops and beets.

Read more...

Monday, April 5, 2010

Pasta with Artichokes and Tomatoes

Most of what I cook is very simple.  Probably, all of it is. I've always cared about and been interested in cooking, but about 5 years ago, I started trying to get better at it.  Deliberately better.  I started being more patient, taking more time, being more thoughtful about the process.  I stopped trying to make any recipe that sounded good in a cookbook (generally with ridiculous results) and started thinking about how to make simple, every day food as well as I possibly could.  This is one of the dishes that I make frequently and that Kid Cayenne and I enjoy a lot.  It is incredibly simple.


Serves 2-3 as a main dish, 4 as a side

1/2 pound hearty pasta like bowtie, penne or fusili (use a nice pasta like DeCecco for even happier results)
2 TB olive oil
2 shallots, sliced
2 cloves garlic, minced
1 can artichoke hearts (preferably in water, not marinade), drained and cut in halves or quarters
1/2 c dry white wine (I use Sauvignon Blanc)
15-16 grape tomatoes, cut in half lengthwise
5-6 leaves of basil, chiffonaded (cut into strips)
about 1/4 c Parmesan Reggiano and a bit more for topping
salt and pepper to taste

Set your pasta water to boil while you mince your shallot and garlic and halve your artichoke hearts.

Heat olive oil in a large skillet on medium heat until it just begins to shimmer,  Add shallots and cook gently until they are transparent.  Add garlic and cook with the shallots for about a minute.

Meanwhile, add your pasta to the salted, boiling water and set your timer for however long the package says they should cook.  This is generally about 12 minutes and will be just about how long you need to finish cooking the artichokes and tomatoes.

Back to your skillet of shallot and garlic.  Add drained artichoke hearts and stir gently to combine.  Add a pinch of kosher salt.  Let them cook without poking at them too often.  You want the sugars in the shallots and garlic to release, getting a little sticky and turning golden.  Let the artichoke hearts get plenty of contact with the pan.  Turn them now and then, but if you aren't seeing the reaction you want, turn less.  Cut your tomatoes and basil while you're waiting.

After about 4-5 minutes of cooking, you should start seeing the artichokes start breaking down and the onion and shallots caramelizing and sticking a bit to the bottom of the pan.  Add white wine and stir a bit to loosen everything up.  Let it cook down and absorb.  Add tomatoes and lightly stir in.  The tomatoes will release a little juice into the dish.  You want them to cook for a couple of minutes to get warm but not long enough to completely break down.  Lower your heat a bit if there is too much cooking happening.

Your pasta should be just about finished.  Add a 2-3TB of the boiling pasta water to the pan of artichokes and tomatoes and stir to release all the flavor from the pan.  Stir in grated Parmesan.  Drain the pasta and add it to directly to your skillet of vegetables.  Mix together and then season with salt and pepper.  Add most (but not all) of your basil  (leave a little to garnish at the end).  Add more Parmesan and basil once the pasta is plated.

Read more...

Thursday, April 1, 2010

I Long For Summer Vegetables


Early spring puts me in a weird place when it comes to planning what to cook.  I no longer want the warm, hearty dishes of winter but the ripe produce of summer hasn't shown up yet.  I'm left wanting a fresh, light meal with little option for creating it.  I draw a lot of blanks.  Last night was no different.  I decided on making a pasta salad that I usually do all summer, using produce that can sort of, kind of be counted on year round.  While I can't say that the dish was as delightfully flavorful as it will be when I make it in July or August, it was good and it did scratch that itch.

A note about the corn... I had planned on just adding canned or frozen corn to the salad but when I went to the grocery, there was a small stack of tiny, barely there, scraggly cobs of corn.  I knew they couldn't possibly be good yet but I couldn't resist.  Truth is, despite being a crazy .79 cents a cob, they were delicious.

Pasta Salad

1 lb fusili pasta, cooked according to the package and cooled in ice water immediately after
kernels cut from 2 cobs of corn that have been blanched in the remaining pasta water for 2 minutes, then cooled in ice water
6 stalks of asparagus, also blanched in the pasta water for 30 seconds, then cooled in ice water and chopped into 1 inch pieces
1 yellow crookneck squash, diced
1 red bell pepper, diced
1/2 of a red onion, diced
1/2 cucumber, peeled and diced
1 avocado, peeled and diced
about 15 grape tomatoes, chopped
about 10 pitted green olives, chopped
a few sprigs of fresh dill, minced
1 can of cannellini beans, rinsed and drained

extra virgin olive oil
salt and pepper

Cook the pasta and then pull it out of the boiling water with a slotted spoon or spider instead of dumping it all into a strainer.  Immerse pasta in ice water to cool it down.  Keep the pasta water boiling and use it to blanch your corn and asparagus quickly before also putting them in ice water to stop the cooking and cool them down.  Combine all fresh ingredients together with the cooled pasta and beans.  Drizzle with olive oil and season with salt and pepper to taste.


.......................................................


What are you making for dinner this time of year?

Read more...

Sunday, February 28, 2010

Hasselback Potatoes with Garlic

I imagine that the Hasselback potato recipe at  SeaSaltWithFood gets a lot of traffic.  Why wouldn't it?  The photo of a thinly sliced but still intact potato, golden and crispy, draws the stomach's eye in instantly.  A quick read shows that not only is the presentation striking, the recipe is easy as can be.  I couldn't resist.

My version is nearly identical but adds a little cayenne pepper because I live in Louisiana and Kid Cayenne is a bonafide Cajun, so that's just how we roll.


Preheat oven to 425˚F.

Potatoes
Approximately 1 clove of garlic per potato  (if you are a garlic lover, as we are.  Less if you are not)
Olive oil
Cayenne pepper(optional)

Kosher salt
Freshly ground pepper

Butter (optional)

Take each potato, in this case I used Yukon Gold, and make thin slices in it without cutting all the way through, as evenly spaced as you can manage.  Helpful tricks include placing the potato in a wooden spoon or setting it between two chopsticks as you cut.  This provides a guide that prevents you from cutting through the potato.  I found it easier than I thought it would be not to cut through.  I went about 2/3rds of the way through the potatoes using a very sharp chef's knife.    I tried the spoon trick and found it easier to just do it by hand, but your mileage may vary.

Once you have cut the potato, slide thin slices of garlic clove between each slit of potato.  You can put less garlic if you like.  You can put no garlic if you like.  The garlic only affects the flavor of the potato, not the way it will cook.  Place potatoes in a baking pan and drizzle with olive oil.  Season with salt and pepper and a very light sprinkle of cayenne.  Bake in oven for approximately 45 minutes for medium sized potatoes.  Finished potatoes should be soft enough to slide a fork through on the inside, but golden and crispy on the outside.  Dot with a bit of butter at the end, if you like.


They are delicious and adorable.

Read more...

Tuesday, February 23, 2010

Green Pea and Lemon Risotto with Roasted Asparagus

I was craving spring...


...so I made a simple pea risotto with a touch of lemon, roasted some asparagus to put on top and covered the whole thing with thick shavings of Parmesan Reggiano.

Green Pea and Lemon Risotto

2-3 shallots, minced
2 cloves garlic, minced
2 TB olive oil
1 cup arborio rice, uncooked
about a 1/2 cup dry white wine
1 quart chicken stock
1 1/2 cups frozen peas, thawed
juice and zest of half a lemon
2 TB butter
1/4 cup grated Parmesan Reggiano + more shaved for topping

First, get your stock into a spare saucepan and heat it to a simmer on a spare stove burner.  You will need this to be warm later.

Add olive oil to a heavy bottomed medium pan (I used a dutch oven but any sauce pan with good heat distribution will do) over medium heat.  When hot, add shallot and garlic.  Saute until soft.  Add the rice and stir gently until every grain is covered in oil and they begin to go translucent.  Add wine and stir in until absorbed.  Now, begin adding your chicken stock in increments.  I add two or 3 small ladles at at time and stir gently until the rice absorbs it, then add more.  Continue to add the stock for as long as the rice will continue to absorb it.  Taste occasionally for texture.  When the rice is beginning to get soft enough to eat, add the peas and lemon juice and zest.  Continue to cook until risotto is the texture you desire. If you run out of stock before the rice is finished being thirsty, add small amounts of boiling water to supplement it.  When risotto is softly al dente, add butter and parmesan and season to taste with salt and pepper.  Top with a generous portion of shaved Parmesan and a side of roasted asparagus.

Roasted Asparagus

1 bundle of asparagus, trimmed of woodiness, washed and dried
1-2 TB olive oil
juice of half a lemon
grated or shaved Parmesan Reggiano for topping

Heat oven to 425 degrees F.

Place asparagus on a baking pan.  Drizzle with olive oil and roll to coat all sides of the asparagus with oil.  Season with kosher or sea salt.  Place in oven for 8-12 minutes or until they are starting to caramelize lightly.  Remove from oven and sprinkle with lemon juice and Parmesan Reggiano.

Voilà!  Spring!

Read more...

Wednesday, January 27, 2010

Pan Seared Lamb Chops with Broccolini and Shitake Mushrooms

For lunch today, I tried making lamb chops for the first time. I don't know why I haven't thought of doing that before. It's another of those things that is so quick and easy to cook, that it's perfect for lunches at home. For sides, I sautéed broccolini and shitake mushrooms (separately). Here is how it went down.


I figured the easiest way do do lamb chops would be a quick pan sear. I rubbed them lightly with olive oil, seasoned with sea salt and freshly ground pepper, them let rest for a moment while I heated the pan.

I trimmed the broccolini and crushed and chopped a glove of garlic. I also prepped the baby shitake mushrooms (not shown) by removing the stems, which may not have been necessary, as young as they were, but I did so anyway.


I used a small cast iron skillet for the chops, heating it well before adding just a tiny bit of olive oil. The lamb chops went into the pan and stayed on the first side for about 4 minutes before I flipped them to the other side and cooked for another 2 minutes. I realized, as I flipped them, that either my heat was too high or I had left them too long because rather than just a good sear, they had actually begun to look fried. Maybe it was the extra bit of olive oil...


As the chops were cooking, I sautéed the broccolini with red pepper flakes in olive oil in a separate pan at medium high heat for a few minutes, adding the garlic almost at the very end. A sprinkling of kosher salt and fresh pepper finished it off.


As soon as the lamb chops were done, I removed them from the skillet and let them rest for a moment while I added a dab of butter and the mushrooms to the same pan, letting them soak up some of the pan flavor that the lamb chops had left, then returned the chops to the pan for one final sweep though the mushroomy butter reduction that was forming.


The verdict?

I overcooked the lamb chops. Not to the point of inedibility, but just enough that they were completely cooked through, with not a bit of pink in the inside. I know now what to do better next time. Less time on the first side, cook less than I think I should if I want medium rare, then let it rest to finish, and really... they let off enough of their own fat that other than that first rubbing with oil, I don't think any extra is necessary.


Anyone have suggestions for how I could have done this better?  I'd love to try it again soon.

The broccolini and mushrooms were delicious and needed no tweaking.

Read more...

Thursday, January 7, 2010

Lentilles du Puy with Vegetables


I first read about lentilles du Puy at David Lebovitz's blog, several years ago. He called them the 'caviar of lentils' and explained that these French green lentils are specifically grown in volcanic soil without fertilization, giving them a flavorful, mineral-rich quality that is lacking in regular lentils. Sounded good to me except that I couldn't find them in any local stores and couldn't see for myself what the fuss was about. Over time, I heard others extoll the virtues of Puy lentils, but without a source, they stayed off my radar. It seemed silly to order lentils on the internet. Sure, they sound nice, but a lentil is a lentil, yes? Except... no.

Recently, a British friend asked me if I needed anything from her corner of the world and out of the blue, lentilles du Puy popped into my head. I asked if they were available near her and sure enough, they were common and available in two forms: dry and precooked. She mailed me some of both and now, now I really get it.  They are wonderful and completely unlike the mushy, lackluster lentil of my mother's soups.  Peppery, substantial, they hold their shape and hold their own.  These are lentils with a purpose in life.  These are the kind of lentils you can really base a meal around.


Last night, I was looking for something warm, nourishing and wintery to cook that didn't have to braise or simmer for a long time.  Puy lentils with sautéed vegetables was the perfect thing.  Using the tiny white turnips I got Tuesday at the Hollygrove Market and Farm, a few carrots, a yellow squash and a bit of red cabbage, I improvised a meal.


The lentil package instructions directed me to rinse and drain the lentils (I used one cup), put them in a saucepan covered by twice their volume of water, bring to a boil and then simmer for 15-20 minutes until al dente.  Then, drain and serve.  It also suggested replacing the water with vegetable stock, wine or a half and half solution for extra flavor.  I chose to go that route, using a half carton of vegetable stock and some left over sauvignon blanc.  I set those to simmer and then began work on the vegetables.


Using a large skillet, I first sautéed two chopped shallots and a clove of minced garlic in olive oil until soft and fragrant.  Next, I added the quartered baby turnips, figuring that they would take the most time to cook.  When they were beginning to soften and caramelize, I added the carrots and let them do the same.  When both were nearly done, I added yellow squash to the pan and let them all get golden.  I also salted the vegetables lightly at this point.


I debated adding the cabbage to the same mix, but decided, at the last minute, to cook it separately so that I could add a bit of red wine vinegar and let it braise quickly before bringing all of the vegetables together in the end.  I removed the cooked vegetables from the pan and let just the cabbage,  a bit of salt and a sprinkle of red wine vinegar meld together.


It only took about 30 seconds for the vinegar to absorb and the cabbage to begin to soften at which point I added the rest of the vegetables back to the pan.  I don't know if this was a necessary step, really.


The vegetables and lentils finished at about the same time.  I drained the lentils, returning them to the hot pan, and drizzled them with a bit of nice olive oil.  Then I plated the lentils and vegetables together, sprinkled with sea salt and a splash of balsamic vinegar and that was that.  I probably would have done just as well to dump the lentils into the pan with the vegetables and let them pick up some of the oil and flavor from the pan.


And there it is!  A simple, delicious and quick meal for a chilly night.

Now... if anyone can tell me where to get Puy lentils in New Orleans, I would be very thankful.

Read more...

Wednesday, August 26, 2009

Seared Yellowfin Tuna and Stir Fried Bok Choy

I enjoy making lunches with fresh seafood because it is quick, light and easy to portion for just one. It's also nice to indulge in a more expensive piece, because I need so little of it. Today's lunch consisted of a small piece of sushi grade yellowfin tuna and a side of stir fried bok choy.


Seared Yellowfin Tuna for one

I wanted a simple Asian marinade and initially thought to use only oil, rice vinegar and ginger until I saw this recipe from Simply Recipes. Since I had everything it called for on hand, I went ahead and added the extra ingredients, to lovely effect. When making one serving only, I went with the following proportions:

1 sushi grade tuna steak (4-5 oz)

Marinade:

1 TB sesame oil
1 TB soy sauce (I used a mix of light and dark)
1 TB rice wine vinegar
a bit of fresh ginger, crushed and minced (about a half inch)
a bit of sliced green onion (about an inch)
a squeeze of fresh lime juice


Mix marinade ingredients together and whisk lightly to combine. Coat the tuna with the marinade and leave in the bowl, covering tightly with plastic wrap and and refrigerating for about half an hour. Turn over half way through.

Heat a nonstick skillet to medium high heat. When the pan is hot, remove tuna from the marinade and place in the pan. Sear quickly on each side, just long enough to get a nice crust on the surface. Turn the tuna to let all sides get seared. I like the tuna very rare on the inside, so I didn't leave it long, but you can increase the amount of time based on how rare you like it.

Remove from pan and slice.

Stir Fried Bok Choy for one (adapted from a recipe at Seasaltwithfood)

1 large bok choy cut into 1 inch pieces or 2 baby bok choys left whole or cut in half
1-2 cloves of garlic, sliced
1 TB oil (canola or peanut)
1 TB oyster sauce
2 TB water
sea salt to taste


Clean and cut the bok choy. I also like to dissolve the oyster sauce into the water to make it easier to mix in to the dish while cooking.

Heat oil over medium low heat and add garlic, letting saute very briefly until fragrant and translucent. Quickly remove the garlic to prevent from overcooking and becoming bitter. Set aside. Increase heat to high and add bok choy, stirring quickly. As it begins to just wilt, add water with oyster sauce and garlic. Mix sauce to coat then season with sea salt. Remove from heat and serve.

The finished dish:


Forgive the inept plating and photography.

I get my soy sauce, sesame oil and rice vinegars from Hong Kong Market in Gretna.

Read more...

  © Blogger templates The Professional Template by Ourblogtemplates.com 2008

Back to TOP